Quick Links
Introduction - Before you start
- Optimize your database for maximum performance
- Setup your script directories and files
- Create a new script directory under your application folder. This directory is for the scripts which will create/manipulate the database structure, and insert/manipulate important static data. Place all appropriate scripts in this directory.
Your first script should drop (take this out if the database is of high importance) and create the database, your second should create tables, stored procs, views, etc and so on.
If you have not got any scripts of your database yet then you can use the program "scptxfr.exe" (supplied with SQL Server under C:\Program Files\Microsoft SQL Server\MSSQL\Upgrade ) in order to script out your entire database.
An example command line to use is:
SCPTXFR.exe /s/d /P /f ver0001.sql /H /A
E.g., "SCPTXFR.exe" /s (local) /d Northwind /f ver0001.sql /P mypassword /H /A
- If you have sample data, create another script directory also under your application folder. Place all your insert scripts in there.
- Once all your files are in this directory make sure that they are named correctly. SSW SQL Deploy will determine the order of the scripts from their name. Make sure they are in alphabetical order. If you are unsure, have a look at the Samples\DatabaseSQLScripts folder under your SSW SQL Deploy installation.
Read Rules to Better SQL Server Databases. Instead of manually implementing these rules, use SSW SQL Auditor to automatically implement many of them for you. Download it and give it a go.
It's important that you apply a flexible and useful naming standard to your SQL scripts.
Integrating SQL Deploy into your application
- Using SQL Deploy Check for Version Checks
- Using SQL Deploy Compare to upgrade database changes
- Using SQL Deploy Project Files (.sdproj)
- Using the Options Control
- Create a new Windows Application project (preferably in C# as the code listings)
- Add the control to your Visual Studio .Net toolbox Right-click on the toolbox, and select "Add/Remove Items..."
- Browse for SSW.Framework.WindowsUI.Options.dll under your SSW SQL Deploy folder
- Your toolbox should now have the DatabaseSetupControl:
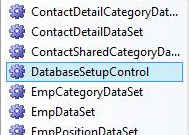
- Figure: DatabaseSetupControl added to the VS.Net toolbox
- Add the control onto your form by dragging the control onto your form.
- Add references to SSW.Framework.Data.dll in order to access the ConnectionBuilder Class
- If you intend to show the compare button, add ExamDiff.exe from your SQL Deploy run directory to your primary output directory.
- Set the configuration of the control using the Configuration property in your load event handler (or constructor).
- Handle the ConnectionStringChangedevent. In the event handler the Configuration.ConnectionBuilder.ConnectionStringChanged would return the selected connection string. Typically you would then store this connection string.
- Note: If you are using SQL Deploy's sample scripts (typically in C:\Program Files\SSW SQL Deploy\Samples\WebForm\DatabaseSQLScripts), it is a good idea to copy them into 3 separate folders:
- CreateScripts - ver0001.sql
- UpgradeScripts - ver0002.sql,ver0003.sql,ver0004.sql,ver0005.sql
- SampleScripts - ver0006.sql
- Using SQL Deploy On Existing DataBase
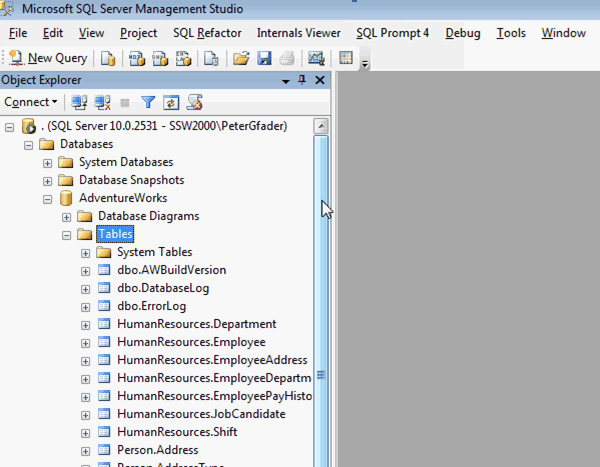
- Figure: AdventureWorks sample database from Microsoft, with no "_zsVersion" table code
The SQL Deploy Check is a COM-compliant assembly which helps finding what version of the database the client currently has. The application may then alert the user that he needs to update the database of version X.XX because the scripts are version X.XX. Connection StringConnection String Gets or sets the connection string to the database.
| Connection String | Gets or sets the connection string to the database. |
|---|---|
| CurrentDatabaseVersion | Gets the version of the current database according to the connection string. This is the last run script against the database, stored in the _zsDataVersion table. |
| NewDatabaseVersion | Gets the latest version of the scripts. |
| SQLScriptPath | Gets or sets the path to the SQL scripts. |
This code illustrates how SSW SQL Deploy Check maybe used in your application.
...
...
string strConnection = "Data Source=(local);Initial Catalog=Northwind;";
string strSQLDatabaseScripts = "c:\temp\Scripts"
ClientUtil cu = new ClientUtil();
if(cu.IsNewVersion(strConnection,steSQLDatabaseScripts)){
MessageBox.Show("Please upgrade your database to "+ cu.NewDatabaseVersion +", it is currently "+cu.CurrentDatabaseVersion);
}
...
The SQL Deploy Compare feature provides the ability to compare all the scripts against the current database and update the new changes.
| Connection String | Gets or sets the connection string to the database. |
|---|---|
| SQLScriptPath | Gets or sets the path to the SQL scripts. |
This code illustrates how SSW SQL Deploy Compare maybe used in your application.
using SSW.Framework.Data.SqlServer;
...
...
string strDatabaseName = "SQLDeploySampleDatabase";
string TempDatabaseName = strDatabaseName + "_TEMP";
string strDatabaseScriptPath = "../DatabaseSQLScripts/";
Settings settings = new Settings();
settings.FolderPath = Server.MapPath(strDatabaseScriptPath);
SQLFileFinder finder = new SQLFileFinder();
finder.FillAdvanced(settings);
finder.SetEnabledOnAllFiles(true);
SQLFileCollection files = finder.EnabledFiles();
settings.Connection = "Server=localhost;Database=SQLDeploySampleDatabase;";
if (DBUtils.DoesDatabaseExist(TempDatabaseName, settings.Connection))
{
DropDatabase(TempDatabaseName, false);
}
settings.ConnectionString.InitialCatalog = TempDatabaseName;
settings.IsNewDatabase = !DBUtils.DoesDatabaseExist(strDatabaseName, settings.Connection);
settings.NewDatabaseName = TempDatabaseName;
settings.PlaceHolder = "[DatabaseNamePlaceHolder]";
foreach(SQLFile file in files)
{
file.SQLFileStepsReplace("'"+databaseName+"'","'"+TempDatabaseName+"'");
file.SQLFileStepsReplace("'"+databaseName+".","'"+TempDatabaseName+".");
file.SQLFileStepsReplace(" "+databaseName+" " ," "+TempDatabaseName+" ");
file.SQLFileStepsReplace("USE "+databaseName+"" ,"USE "+TempDatabaseName+"");
file.SQLFileStepsReplace("DATABASE "+databaseName+"" ,"DATABASE "+TempDatabaseName+"");
}
settings.ConnectionString.InitialCatalog = "";
du.UpgradeDatabase(files, settings, settings.NewDatabaseName, true);
To automate the upgrade process for later use, you can make an sdproj file which stores all the information about your database. SQL Deploy will make this file for you when you run SQL Deploy for the first time.
After the file has been made, package the file with your application. We recommend that you put the file with the rest of your script files in the Script folder we created in the last step.
Now you can just add new script files to the Scripts folder and the next time the user double clicks on the sdproj file, SQL Deploy will automatically select the new scripts. The user should only have to click next through all the screens.
The options control provides means for the application user to select, create, update and compare the application database. The options control is powered by SSW SQL Deploy for all the database creation, upgrade and compare.
The developer can easily implement this control using the following steps:
| ConnectionBuilder | Gets or sets the connection string builder for the connection to the database. |
|---|---|
| CreateScriptsPath | Gets or sets the path to the create scripts folder. |
| NewDatabaseName | Gets or sets the database name (set as default when creating a new database). |
| DatabaseNamePlaceholder | Gets or sets the database name place holder in the scripts which will be replaced with the database name. |
| IsSampleDatabaseNameEnforced | Gets or sets whether the sample database name is enforced on the database creation form. This will set the database name textbox to be disabled if insert sample checkbox ticked. |
| IsDatabaseNameEnforced | Gets or sets whether the database name is enforced on the database creation form. This will set the database name textbox to be disabled. |
| PostCreateScriptsPath | Gets or sets the path to the post create scripts folder. |
| PostUpgradeScriptsPath | Gets or sets the path to the post upgrade scripts folder. |
| PreUpgradeScriptsPath | Gets or sets the path to the pre upgrade scripts folder. |
| ProductName | Gets or sets the product name which will mainly be displayed in the status messages. |
| SampleDatabaseName | Gets or sets the sample database name (set as default when creating a new database with insert sample checkbox ticked). |
| SampleScriptsPath | Gets or sets the path to the sample scripts folder. |
| UpgradeScriptsPath | Gets or sets the path to the upgrade scripts folder. |
Table: Properties to set to configure the control
Below is some sample code of setting the control's configuration & handling the ConnectionBuilder.ConnectionStringChanged event.
Replace the MyConfiguration properties with the paths on your computer. A Sample MyConfiguration Class is shown in the code listing at the bottom.
{
databaseSetupControl1.Configuration.ConnectionBuilder.ConnectionString = MyConfiguration.ConnectionString;
databaseSetupControl1.Configuration.CreateScriptsPath = MyConfiguration.CreateScriptsPath;
databaseSetupControl1.Configuration.UpgradeScriptsPath = MyConfiguration.UpgradeScriptsPath;
databaseSetupControl1.Configuration.ProductName = Application.ProductName;
databaseSetupControl1.Configuration.SampleScriptsPath= MyConfiguration.SampleScriptsPath;
databaseSetupControl1.Configuration.NewDatabaseName = "SSWSQLDeployNorthwindSample";
databaseSetupControl1.Configuration.IsDatabaseNameEnforced = true;
databaseSetupControl1.Configuration.ConnectionBuilder.ConnectionStringChanged+= new EventHandler(Configuration_ConnectionStringChanged);
}
private void Configuration_ConnectionStringChanged(object sender, EventArgs e)
{
// MessageBox.Show("The connection string has changed, please handle here.",Application.ProductName);
}
Then set the paths for the configuration accordingly. The listing below shows the MyConfiguration class encapsulating those script paths.
{
public MyConfiguration() {}
public static string ConnectionString
{
get { return ""; }
}
public static string CreateScriptsPath
{
get { return @"c:\Program Files\SSW SQL Deploy\Samples\WebForm\DatabaseSQLScripts\Create"; }
}
public static string UpgradeScriptsPath
{
get { return @"c:\Program Files\SSW SQL Deploy\Samples\WebForm\DatabaseSQLScripts\Upgrade"; }
}
public static string SampleScriptsPath
{
get { return @"c:\Program Files\SSW SQL Deploy\Samples\WebForm\DatabaseSQLScripts\Sample"; }
}
}
In this quick walkthrough we configure SQL Deploy for the existing "AdventureWorks" sample database for future changes.
Step 1: Script your existing database to a "00000_create_database.sql" script file
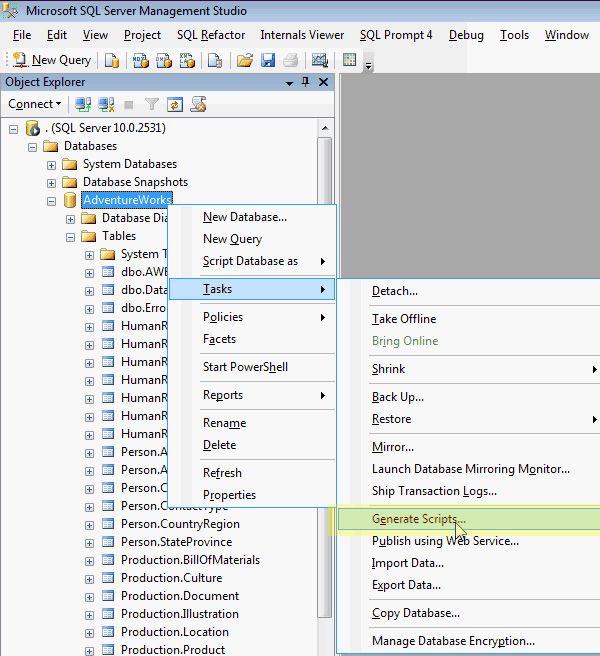
- Figure: Use SQL Server Management Studio (SSMS) to generate scripts to create your whole database
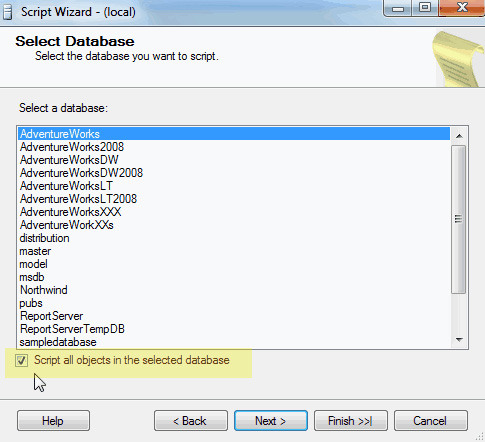
- Figure: Check the "script all objects in the selected database" box
Let SSMS create the "00000_create_database.sql" for you
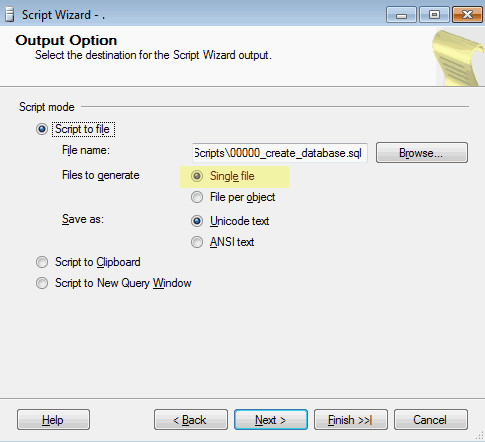
- Figure: Make sure to create 1 single file in your project folder
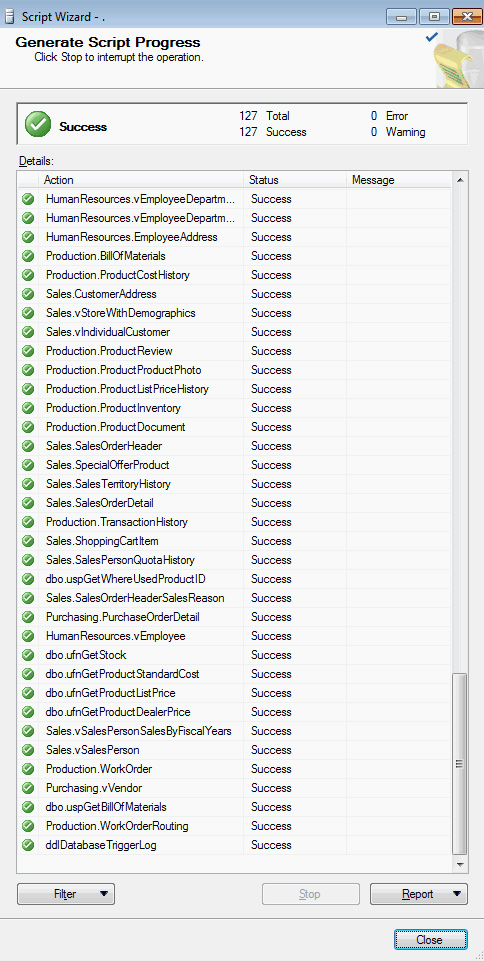
- Figure: Generation of scripts was successful
Add these 2 lines at the start of the script:
CREATE DATABASE [AdventureWorks]
GO
Note: This script is special because it creates a new database. We identify this
by these lines.
Final result of step 1
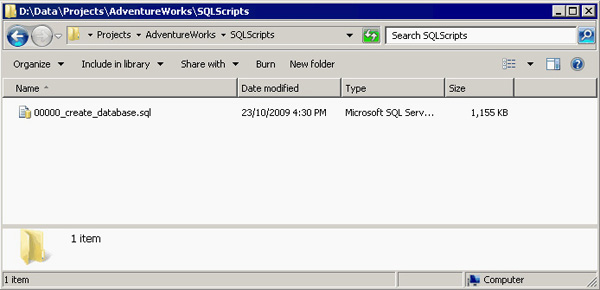
- Figure:One "create database script" file in your project "SQLScripts" folder
Step 2: Tell SQL Deploy that you have run already the "create database script"
Since you have already an existing database, you have to tell SQL Deploy about that.
Copy and paste this script into SQL Server Management Studio and run it on the AdventureWorks database.
This will tell SQL Deploy that this script has been run already.
This step is not necessary if you start with a new database from scratch.
If you wish that SQL Deploy creates a new database for you run the wizard as described on SSW SQL Deploy-Create new database in EXE mode
Final result of step 2
- Run through the wizard to update your database

- Figure: SQL Deploy sees that "00000_create_database.sql" has been run already
- 2. Run "Compare database" and see that your database matches up with the SQL scripts
Your database is ready and you can start using SQL Deploy

Remember: Make sure to script out your changes as described on the SQL Deploy exe mode page
 Sumesh Guimire
 A. Mavrogeorgis
FOLLOW US
KEEP UPDATED